git Overview
git is a very complex and powerful system. However, it can be very useful even if you only use a small portion of its functionality. This page should be bring you up to speed enough to make good use of git for the Python Certificate class.
Note that in the certificate program we will be using git in conjunction with gitHub, a cloud-based service that provides a collaboration environment for software development based on the git version control system.
gitHub provides a web service and web interface that hosts projects and supports collaboration among teams and the open source community. It adds other features, but is very much built on the source control system, git. So a basic understanding of git is required to make proper use of gitHub.
Learning Resources
Introduction to Git and GitHub for Python Developers
“Official” gitHub tutorials:
https://guides.github.com/activities/hello-world/
https://guides.github.com/introduction/flow/
- Other suggested readings:
http://rogerdudler.github.io/git-guide/
https://try.github.io/levels/1/challenges/1
- Pro git: The complete semi-official documentation – the first few chapters are worth going through:
- git Branching: Interactive tutorial about branching – try it right in the browser!
A Graphical Tutorial
A Picture of git

A git repository is a set of points in time, with history showing where you’ve been.
Each point has a name (here A, B, C) that uniquely identifies it, called a hash.
Note: To those computer geeks among us – yes, this an actual hash of ALL the files in the repo at that point in time – so it uniquely identifies the exact state. That is why it’s a long ugly set of seemingly random characters. But when using git, all you need to know is that it is a name that identifies that unique state.
The path from one point to the previous is represented by the difference between the two points.

Each point in time can also have a label that points to it.
One of these is HEAD, which always points to the place in the timeline that you are currently looking at.

You may also be familiar with the label “master”.
This is the name that git automatically gives to the first branch in a repository.
A branch is actually just a label for a certain set of points in time.

When you make a commit in git, you add a new point to the timeline.
The HEAD label moves to this new point.
So does the label for the branch you are on.
A lot of terms in git are “overloaded” - used in multiple ways. For instance, the verb “commit” is the act of committing the state of your files to git – saving that state so you can go back to it later.
The noun “commit” is a particular state of the repository – it has been saved and has particular name (hash) – it is one if the points on that timeline.
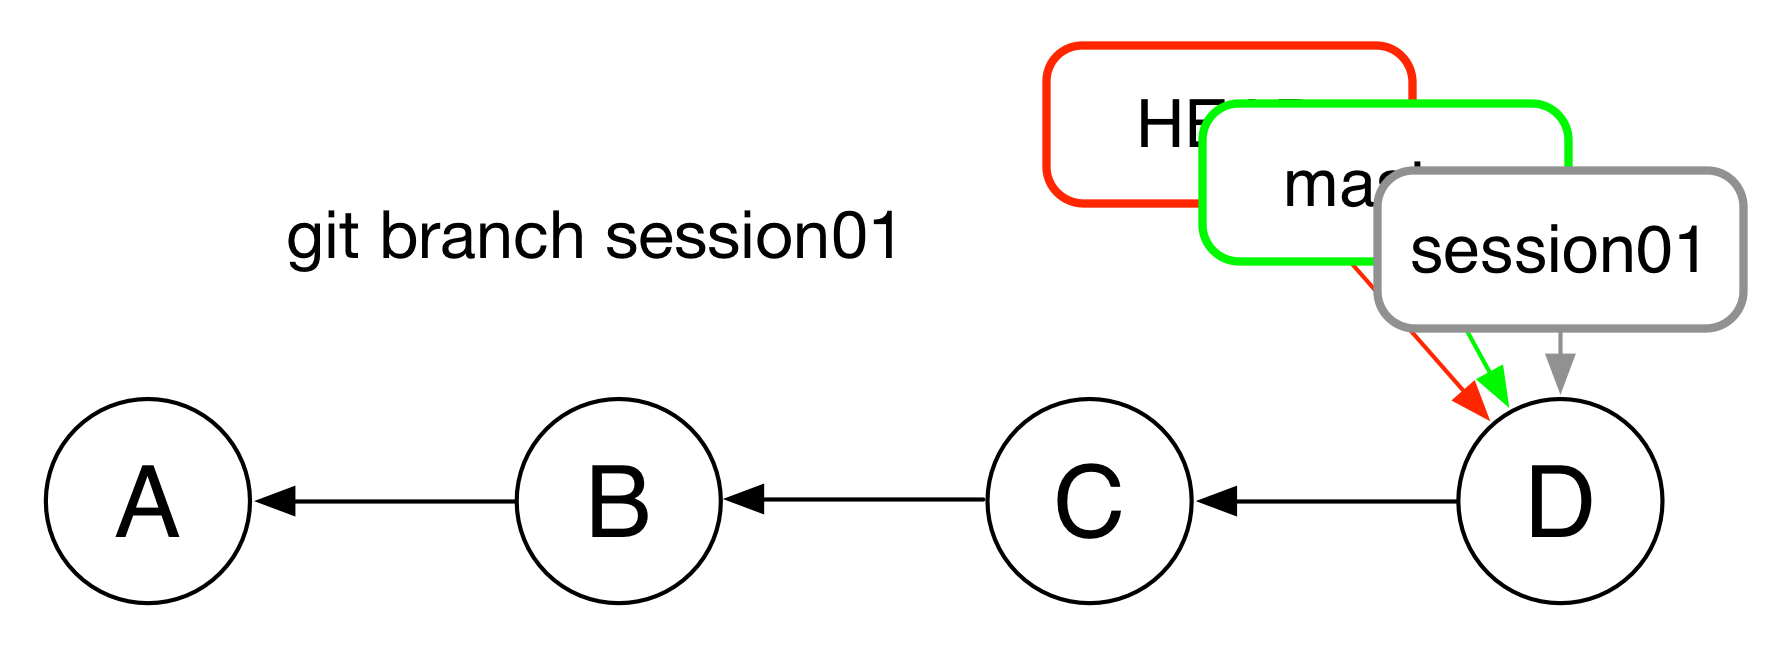
You can make a new branch with the branch command.
This adds a new label to the current commit.
Notice that it does not check out that branch – you will still be working in the current branch.

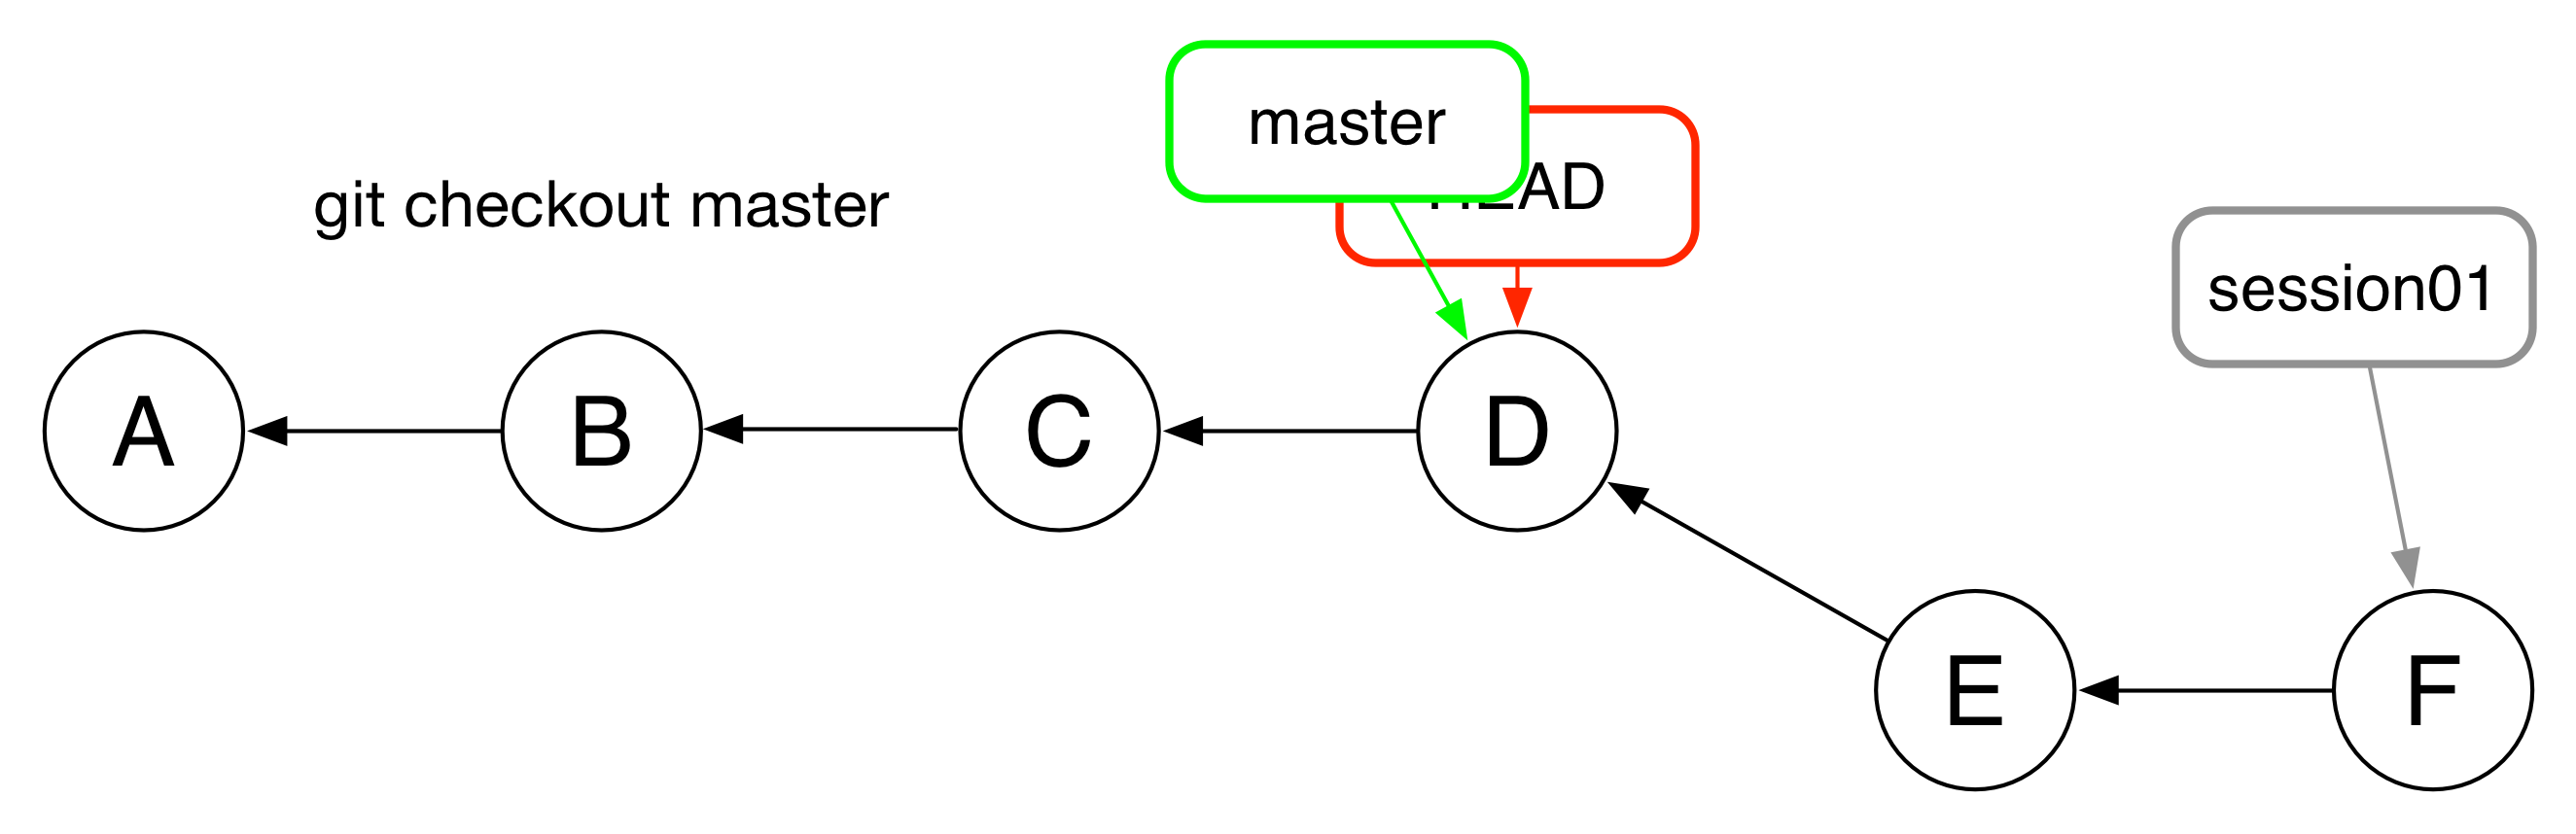
You can use the checkout command to switch to the new branch.
This associates the HEAD label with the session01 label.
Use git branch to see which branch is active:
$ git branch
  master
* session01

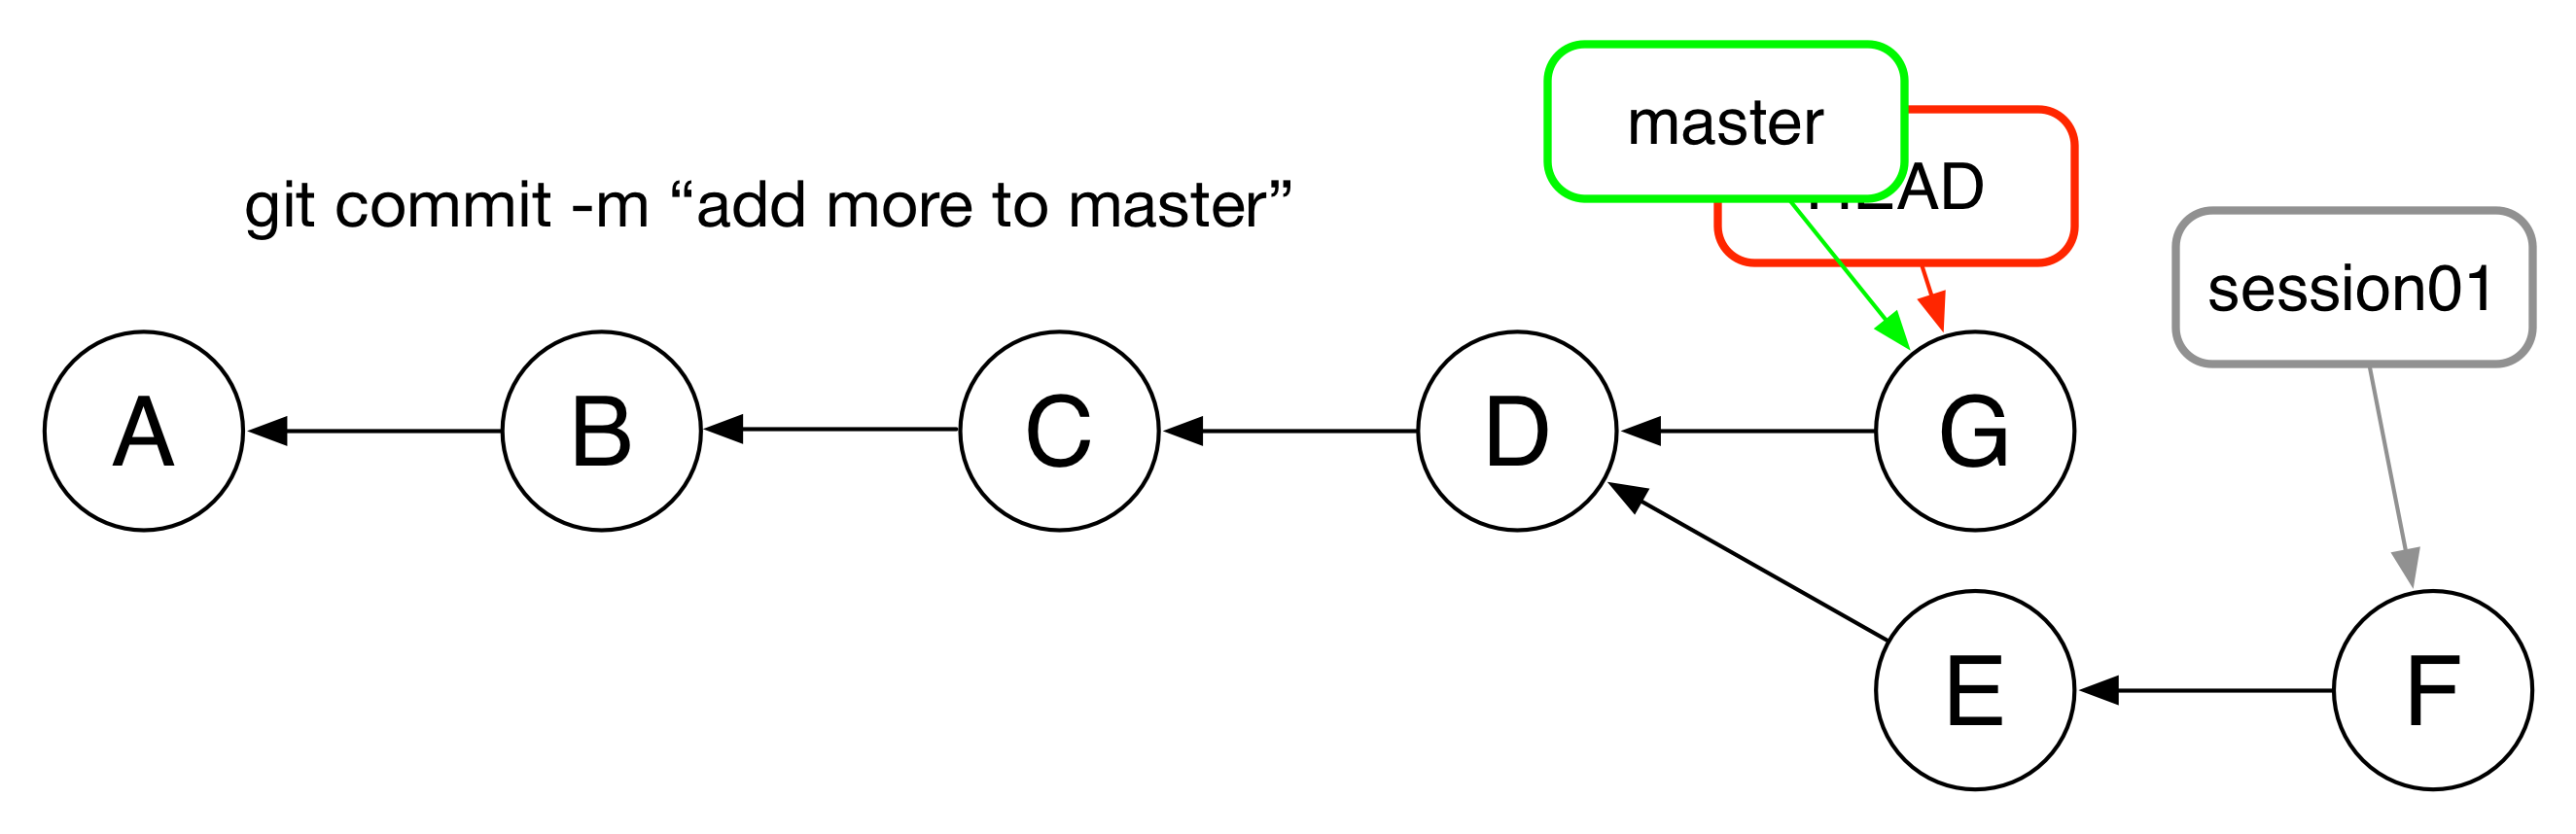
While it is checked out, new commits move the session01 label.
Notice that HEAD is always the same as “where you are now”
You can use this to switch between branches and make changes in isolation.
Branching allows you to keep related sets of work separate from each-other.
In our lessons, you can use it to do each of your exercises.
Simply create a new branch for each session from your repository master branch.
Do your work on that branch, and then you can issue a pull request in github to have your work evaluated.
This is very much like how teams work in the “real world” so learning it here will help you.
The final step in the process is merging your work.
The merge command allows you to combine your work on one branch with the
work on another.
It creates a new commit which reconciles the differences:

Notice that this commit has two parents.
Sometimes when you merge two branches, you get conflicts.
This happens when the same file was changed in about the same place in two different ways.
Often, git can work these types of things out on its own, but if not, you’ll need to manually edit files to fix the problem.
You’ll be helped by the fact that git will tell you which files are in conflict.
Just open those files and look for conflict markers:
- <<<<<<<<< hash1 (stuff from the current branch)
- ========= (the pivot point between two branches’ content)
- >>>>>>>>> hash2 (stuff from the branch being merged)
Your job in fixing a conflict is to decide exactly what to keep.
You can (and should) communicate with others on your team when doing this.
Always remember to remove the conflict markers too. They are not syntactic code in any language and will cause errors.
Once a conflict is resolved, you can git add the file back and then commit the merge.