Turning Sublime Text Into a Lightweight Python IDE
A solid text editor is a developer’s best friend. You use it constantly and it becomes like a second pair of hands. The keyboard commands you use daily become so ingrained in your muscle memory that you stop thinking about them entirely.
With Sublime Text, it’s possible to turn your text editor into the functional equivalent of a Python IDE. The best part is you don’t have to install an IDE to do it.
Requirements
Here are my requirements for an ‘IDE’:
- It should provide excellent, configurable syntax colorization.
- It should allow for robust tab completion.
- It should perform automatic code linting to help avoid silly mistakes and conform to good style.
And some more advanced features that you may want later:
- It should offer the ability to jump to the definition of symbols in other files.
- It should be able to interact with a Python interpreter such that when debugging, the editor will follow along with the debugger.
Which Version?
Use version 3 – it is updated now and again, so make sure to get the latest.
Use Sublime Version 3
Basic Settings
All configuration in Sublime Text is done via JSON. It’s simple to learn. Go and read that link then return here.
Note
JSON is very similar to Python dict and list literals. Though it has its root in Javascript, it is also used in a wide variety of applications, and is well supported by Python. But a key difference is that it does not allow trailing commas after items in lists – so be careful.
There are a number of different levels of configuration in Sublime Text. You will most often work on settings at the user level.
Open Preferences -> Settings
On a Mac, you can find it under:
Sublime Text -> Preferences -> Settings
Sublime will open up a split window – “default” and “user” – you can look through the default ones to see all the setting you might want to override, and then copy things from default by putting them in the user file.
The preferences file is simply a JSON text file you edit like any other text file.
Here’s a reasonable set of preliminary settings (theme, color scheme and font are quite personal, find ones that suit you.):
{
    "auto_indent": true,
    "color_scheme": "Packages/User/Monokai (Flake8Lint).tmTheme",
    "draw_white_space": "all",
    "font_face": "inconsolata",
    "font_size": 23,
    "indent_to_bracket": true,
    "rulers":
    [
        79,
        95
    ],
    "theme": "Adaptive.sublime-theme",
    "smart_indent": true,
    "tab_size": 4,
    "translate_tabs_to_spaces": true,
    "use_tab_stops": true,
    "trailing_spaces_modified_lines_only": true,
    "trim_automatic_white_space": true,
    "trim_trailing_white_space_on_save": true,
    "word_wrap": false,
    "wrap_width": 95
}
NOTE: Especially important is the setting translate_tabs_to_spaces, which ensures that any time you hit a tab key, the single <tab> character is replaced by four <space> characters. In Python this is vital!
If you do nothing else, add translate_tabs_to_spaces to your config!
Extending the Editor
Most of the requirements above go beyond basic editor functionality. So we’ll use Plugins.
Sublime Text comes with a great system for Package Control. It handles installing and uninstalling plugins, and even updates installed plugins for you. You can also manually install plugins that haven’t made it to the big-time yet, including ones you write yourself. Happily, the plugin system is based on Python!
To install a plugin using Package Control, open the command palette with shift-super-P (ctrl-shift-P on Windows/Linux).
The super key is command or ⌘ on OS X.
When the palette opens, typing install will bring up the Package Control: Install Package command.
Hit enter to select it.
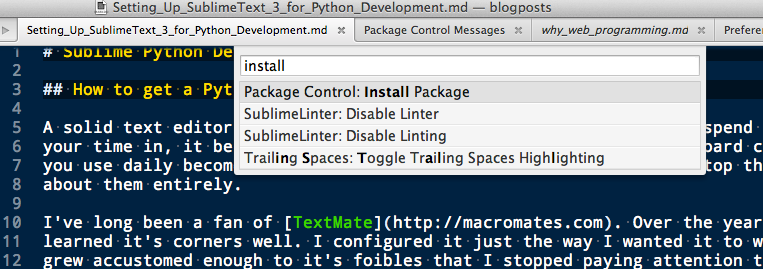
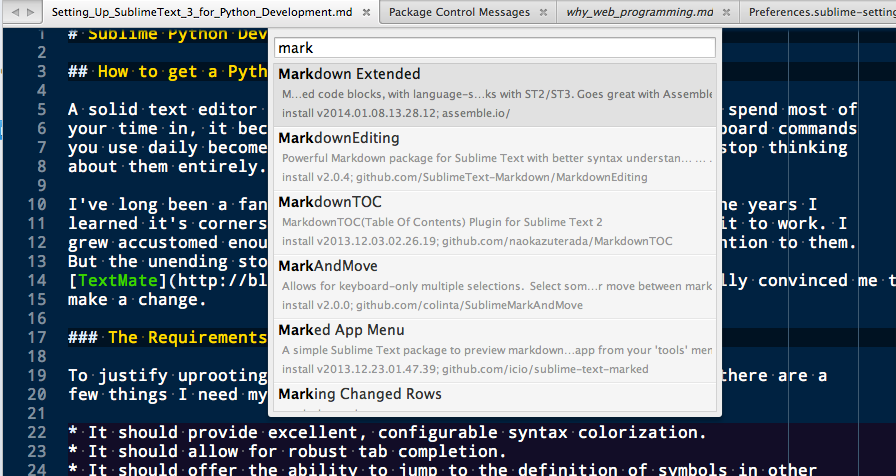
After you select the command, Sublime Text fetches an updated list of packages from the network. It might take a second or two for the list to appear. When it does, start to type the name of the package you want. Sublime Text filters the list and shows you what you want to see. To install a plugin, select it with the mouse, or use arrow keys to navigate the list and hit enter when your plugin is highlighted.
Useful Plugins
Here are the plugins I’ve installed to achieve the requirements above.
Anaconda
There are a bunch of Python-related plugins available. However, Anaconda is a nice package that provides most of the features you want, so plan on using just that one.
Not to be confused with the scientific Python distribution – the Anaconda sublime plugin is a full featured package to turn Sublime into a pretty full IDE:
http://damnwidget.github.io/anaconda/
There are nifty instructions on that page.
By default, Anaconda uses the python interpreter that is in your PATH environment variable. So, the most important configuration option is the python_interpreter option that allows you to use a different Python interpreter, for example, one that resides in a virtual environment, or python3 vs python2.
If you get the right Python when you type “python” at a raw command line, then you are OK. But if not you may need to re-configure it.
{“python_interpreter”: “~/.virtualenvs/myproject/bin/python”}
Note: for detailed information about how to properly configure Anaconda to get the maximum of it, follow “Configure Anaconda the Right Way”.
A few settings you’ll want to change
There are a few setting you may want to change:
max line length for the linter: default is 72, which is pretty short these day. I use 95:
"pep8_max_line_length": 95,
White Space Management
One of the issues highlighted by code linters is trailing spaces. Sublime Text provides a setting that allows you to remove them every time you save a file:
{
    "trim_trailing_whitespace_on_save": true
}
This is a useful setting, but be careful if you are working with existing code: removing trailing whitespace by default causes a ton of noise in git commits.
But if you use it from the start with your code, it will keep it clean from the beginning.
It is suggested in the above settings.
Debugging Support
You’ll probably want to wait on this until you start using a debugger, but it’s a nifty feature when you get there.
The final requirement for a reasonable IDE experience is to be able to follow a debugging session in the file where the code exists.
This: https://packagecontrol.io/packages/Python%20Debugger
Looks promising as a debugger plugin for sublime.